Multi-Factor Authentication, often shortened to MFA, adds an extra layer of security to your Microsoft 365 account. As well as entering your password, you’ll use your mobile phone to confirm that it is really you trying to sign in.
This means that even if somebody gets hold of your password, they still should not be able to access your account without completing the additional security check.
You will need:
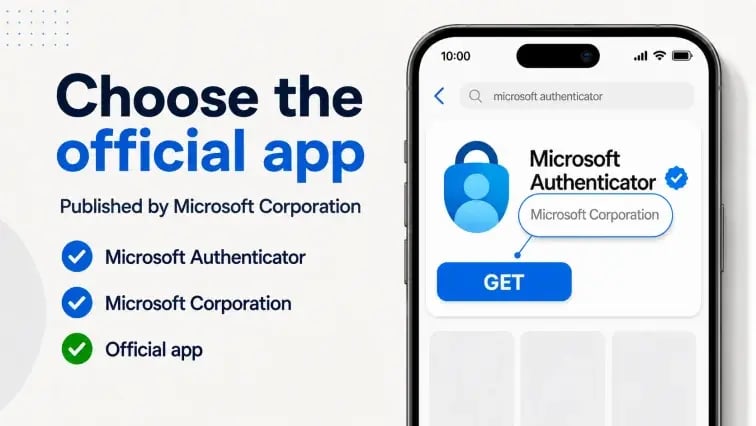
On your phone, open the Apple App Store or Google Play Store.
Search for Microsoft Authenticator and install the official app published by Microsoft. Check the publisher carefully before downloading it to make sure you have selected the correct app.
What is Microsoft Authenticator?
Microsoft Authenticator is a free app from Microsoft that helps verify your identity when signing in, making it much harder for unauthorised people to access your account, even if they know your password.
The app is only used to confirm your identity. It does not give your employer or your IT provider access to your personal photographs, messages or other information stored on your device.
To learn more about Microsoft Authenticator and how it handles your data visit Microsoft's Authenticator FAQs.
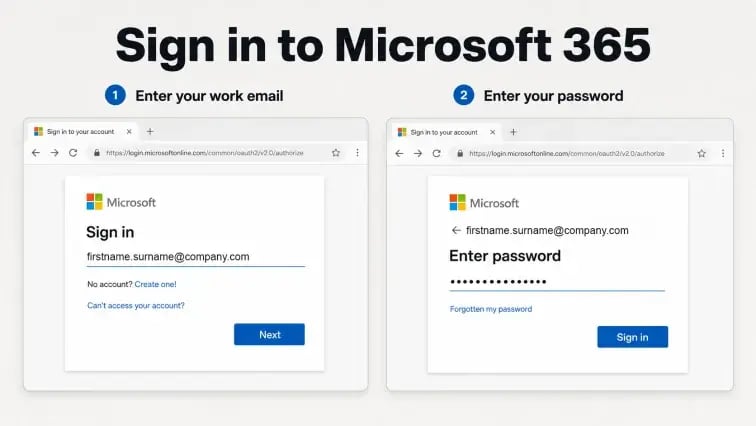
Once Microsoft Authenticator has been installed, return to your computer.
Sign in to your Microsoft 365 account (portal.office.com) using your usual email address and password.
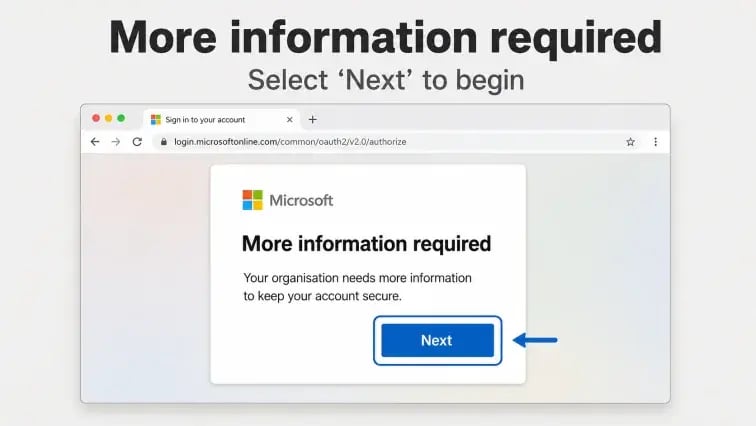
Once MFA has been enabled on your account, you’ll see a message explaining that more information is required.
Select Next to begin.
The recommended method is the Microsoft Authenticator app.
Select Microsoft Authenticator and then select Next. Proceed to Step 4
If you would rather not install Microsoft Authenticator, select I want to set up a different method at the bottom left of the screen.
Choose Phone and enter your telephone number. You can then choose to receive a sign-in code by text message or receive a telephone call.
Follow the instructions shown on screen to verify your number. Once complete your MFA is set up and you don’t need to follow the rest of this guide.
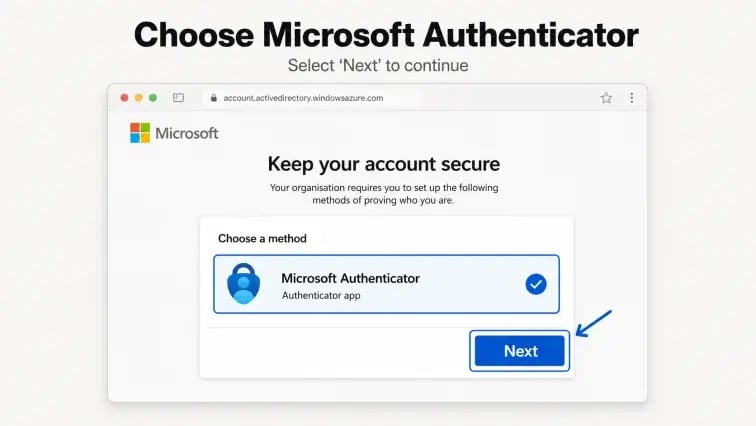
You’ll now be asked how you would like to secure your account.
Choose the Microsoft Authenticator app and select ‘Next’.
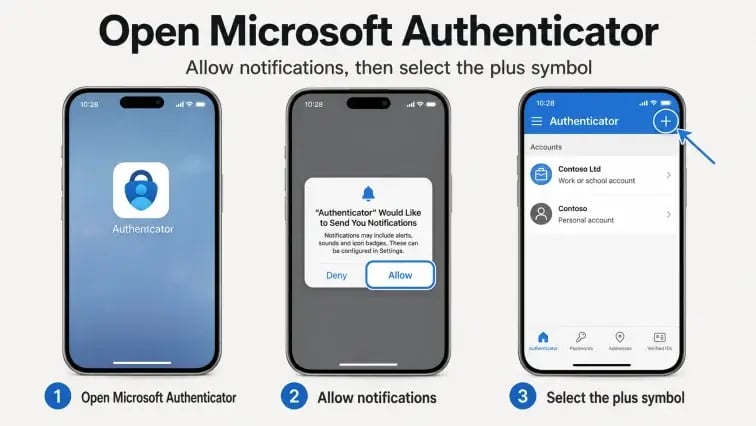
Open Microsoft Authenticator on your phone.
If prompted, allow the app to send you notifications. These notifications will be used to approve genuine sign-in attempts.
In the app, select the plus symbol to add a new account.
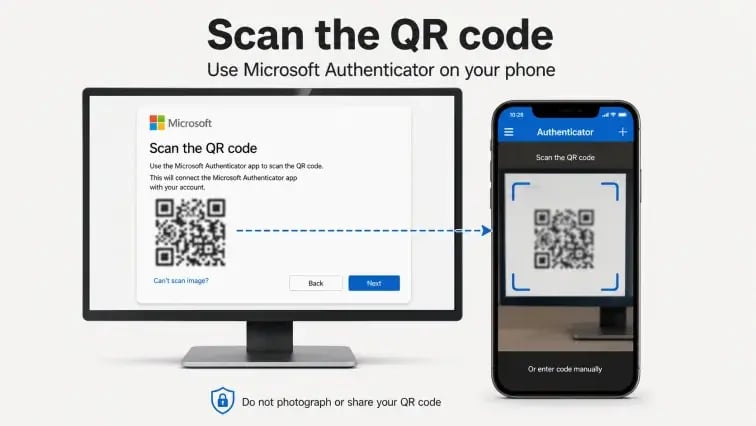
Return to your computer and select Next. A unique QR code will appear on your screen.
Use Microsoft Authenticator on your phone to scan the QR code shown on your computer.
Important: Do not photograph your QR code or share it with anybody else.
Once the QR code has been scanned successfully, select Next on your computer.
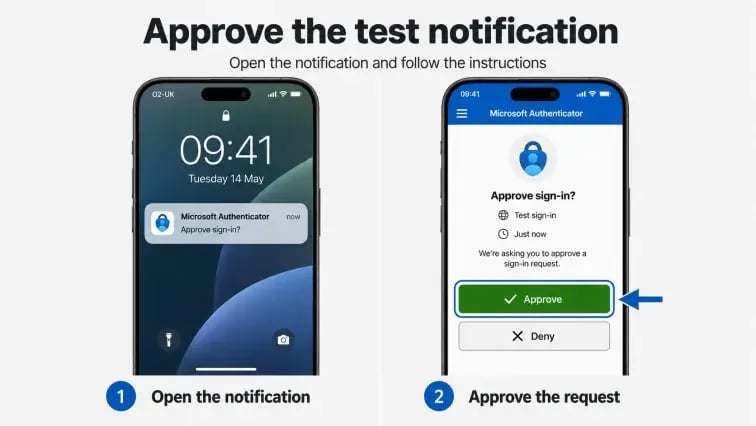
Microsoft will send a test notification to your phone.
Open the notification and follow the instructions to approve the request.
You may be asked to enter a number displayed on your computer into the Microsoft Authenticator app.
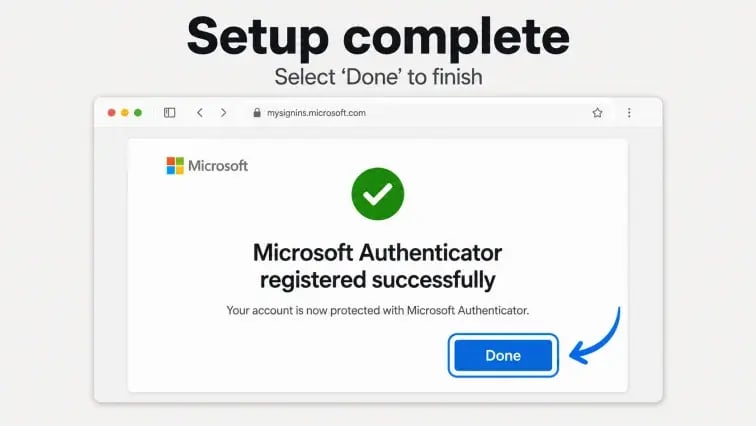
Once the request has been approved, return to your computer to complete the setup.
After approving the test, you should see confirmation that Microsoft Authenticator has been registered successfully.
Select Done to finish.
MFA is now active on your Microsoft 365 account, and you can continue using Microsoft 365 as normal.
You won’t necessarily need to use your phone every time you sign in. However, you may occasionally be asked to confirm your identity, particularly when:
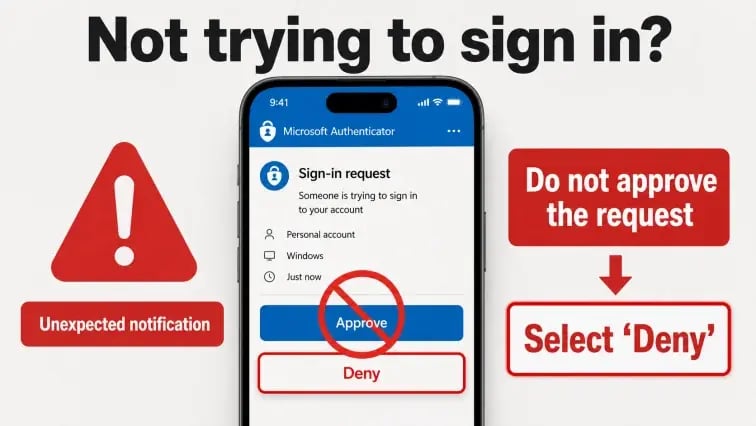
Before approving a Microsoft Authenticator notification, check that the information matches something you are currently doing.
Only approve a request when you are actively trying to sign in to your account.
If you receive an Authenticator notification when you are not trying to sign in:
An unexpected request could mean that somebody is attempting to access your account.
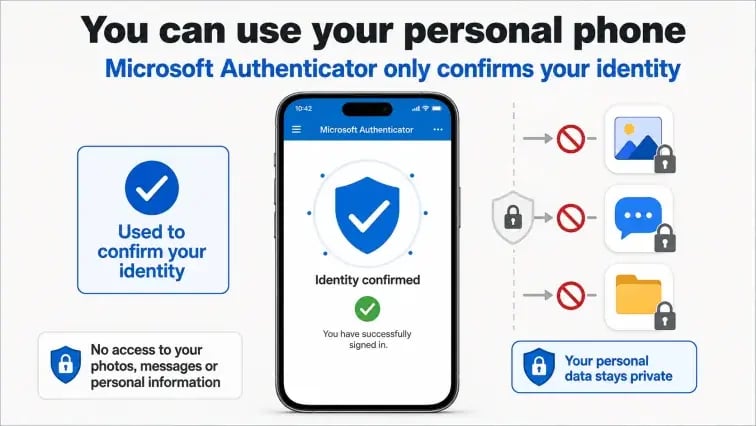
Yes. You can use Microsoft Authenticator on your personal phone.
The app is only used to confirm your identity. It does not give your employer or the One2Call IT Service Desk access to your personal photographs, messages or other information stored on your device.
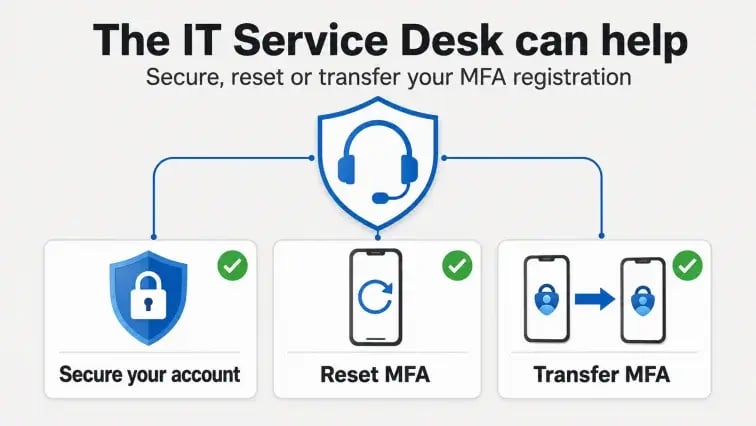
If you experience any problems, contact the One2Call IT Service Desk.
When raising your support request, please provide:
This will help the team investigate the issue and get you set up.
One2Call customers can contact the IT Service Desk for help.
Thank you for helping us protect your organisation’s systems and data.


